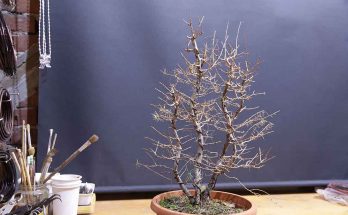
Finding a plant for bonsai is always a challenge. As described before, there are many sources for bonsai material. This Pinus mugo ‘Carstens wintergold’ I found at a local nursery. It was for sale for unclear reasons. In any case.. They happy, me happy.
Strong and weak points

Mugo pine as purchased 
Mugo pine before repotting
This nursery stock pre-bonsai was grown to become a green ball in a garden, and to highlight the garden in winter with a yellow tone to the needles. This is also the interest which sparked me to get it. I do not have trees that purposely turn yellow in winter. (Although some of my junipers do turn bronze with frost!).
When I inspected the tree, I noticed the trunk is very thick for a small nursery plant. Considering this is a special cultivar, the plant is probably grafted. It is unclear what the rootstock is. It could be P. sylvestris, or P. mugo. Right now, there it no clear graft visible so I hope this will not become a problem.
The second negative here is the split trunk. The first side-branch is about as big as the main trunk. However, that is a matter of a few snips with the clippers and the bonsai mugo is starting to appear from the tree.
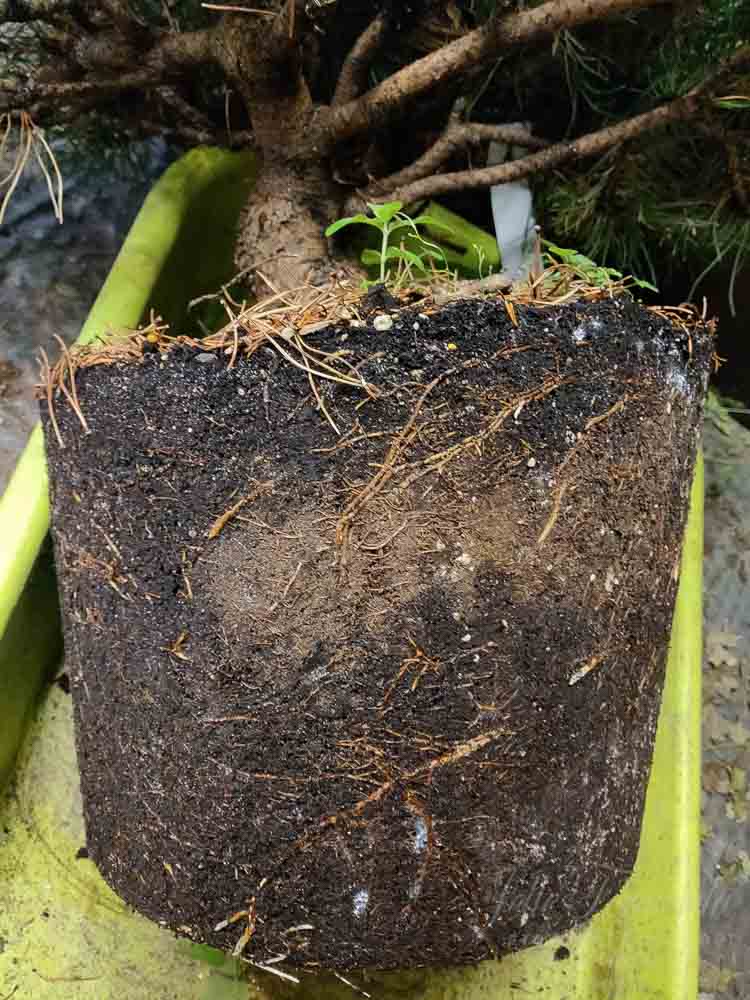
Mugo pine rootball 
Mugo pine trunkline
Repotting mugo pine
There is a broad discussion on when to best repot trees. And reliable sources indicate that a repotting of mugo is best done in late summer, say, august. This reflects the ideal growing time of mugo up in the mountains where they normally occur. As such I decided to go ahead and repot in mid-august after the worst heat of summer broke and a cooler moist period was expected.
Taking the pine from its pot one thing was clear: The tree was happy and had many healthy root tips. All in all, good conditions for a gentle repot. Starting at the bottom, I tease out the roots with a single prone root hook and rotate. Every time gently pulling a few roots, rotating, pulling, rotating. This way it is possible to loosen all the roots and tease out the substrate without damaging and breaking too many roots. After about half an hour most of the roots had been released from the substrate and the rootball looked like a loose curtain of roots. At this point, I trimmed back the roots to the main junctions, taking care to cur back thick roots more than smaller roots. At the same time I removed any roots circling near the trunk, which is what you often find in nursery stock.
I did this work on a very humid day (90+%) and inside a shed, out of wind and sun. As such, I was not concerned about the roots drying out fast. It is however in general a good idea to keep a water sprayer at hand to spray the roots in between. Letting the root surface dry out is very bad for recovery.
Potting up mugo pre-bonsai

Pinus mugo roots combed 
Pinus mugo final
Potting up the plant for me starts with partially filling a relatively small pot with substrate. In the pot I put a little mound of substrate, rotating the trunk as I put it down. I put guy-wires on 3 main branches pulling the tree towards the pot rim, thus stabilizing the tree in the pot. During this process I try to position the tree at the right angle and depth in the pot, optimizing nebari and trunk line. Then I start filling the pot with substrate. After each handful of substrate I use my fingers to tease the substrate between the roots before putting another, filling the pot layer by layer. One the pot is full, I vibrate the pot against the table to compact the soil, and backfill again. After a good thorough watering, the potting up is done.