
Layering is a technique used to grow roots on places where normally roots would not form. This can be used to create more plants, or -as often the case for bonsai- to create a better nebari. Why to use layering can be read here.

For starters, find a plant of which you would like to root a portion. As always with bonsai, think about the angle at which you want to pot the plant. This determines the angle at which you make your cuts. Naturally, you select a branch that has the right movement and taper for your future bonsai.
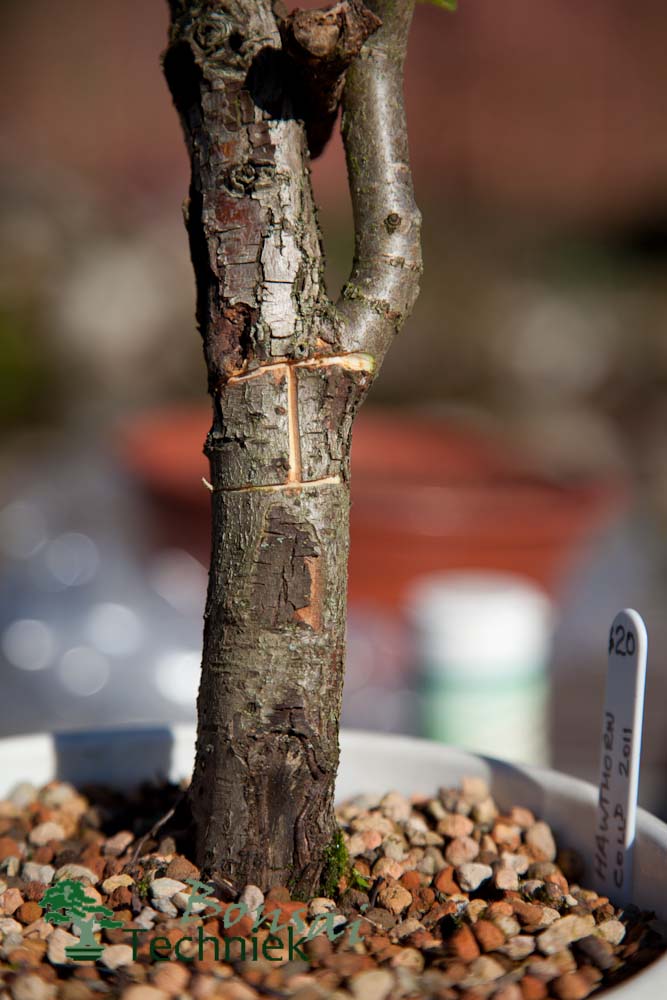
Cutting air layer site 
Air layer site 
Air layer – nebari
Tip: When to layer.. It is a discussion that people do not fully agree upon. In theory one can start layering as soon as the roots start to grow in spring. I do it after buds have opened and the first extension growth has started, until early June.
Decide the point for your future nebari. With a marker or chalk (tip!) draw the level of the future nebari on the bark. Along this line you cut with a sharp, strong knife through the bark. Cut a second circle around the branch a bit below (as an indication for the distance: Equal to the thickness of the branch).
Now peel away the bark between the two cuts. This exposes the cambium layer. This glossy layer also needs to be removed completely: This is the layer that is able to produce new cells and can repair / bridge the gap you just created. Remove the layer by scratching with a knife. Leaving the wound exposed to the air for an hour will also work, as will rubbing it with alcohol. I usually scratch and leave to dry for a bit.

Airlayer – adding sphagnum 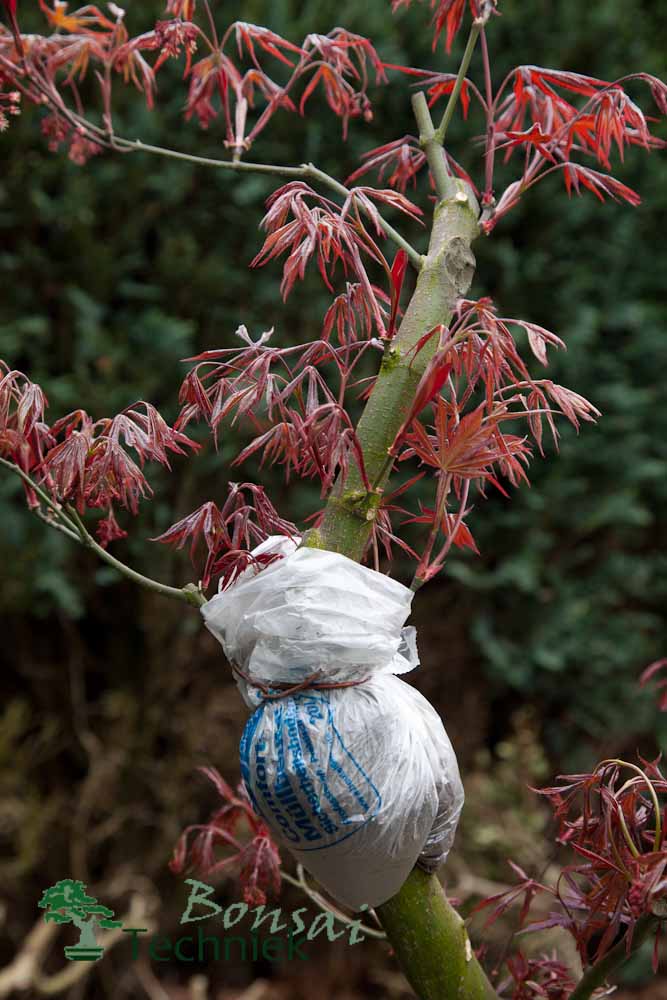
Air layer, waiting time
Prepare a container of foil and fix it to the trunk, ensuring that the bark just above the cuts is well within the container / foil once finalized. Cover the bark with sphagnum moss: You want the bark just above the cuts to stay moist. (Note that sphagnum is not required. Any substrate that keeps it moist works. However, sphagnum helps as it has fungicidal properties).

Now wrap the area up if you use foil, or fill the container further with substrate. Keep an eye on the package: Once rooting starts the plant will start taking up water through these roots. The site can then dry out very quickly. And this has the same effect as normally on roots: The roots die off and the layer will fail.
It depends very much on the species how long a layer takes to root. Anywhere from 4-12 weeks in the growing season is normal. Young, vigorous Maples, Elms and Zelkova are very fast and will root in just 4 weeks or so. Old Junipers and Pines can be very slow and have been known to take over a year. Once you have roots sprouting all around you can separate the top. The roots are now very sensitive so be very careful when separating and planting. I normally keep the new plants out of direct sun and wind for some 2-3 weeks to assist the plant in settling in and growing out the roots.
Tip: If you want to roots to survive it is best to always leave a branch between the layer site and the roots. This way a flow of sugars is maintained to the roots
Tip 2: You can take several layers at the same time from the same plant. Each individual layer should have lots of foliage with uninterrupted bark to the layer for it to succeed Tip 3: An airlayer does not have to be in the air. If you want to do a low layer, you can just elevate the substrate in the pot and ground layer.


